You can create bootable USB flash drive to install Windows directly from USB on you computer/laptop. This quick guide will explain a detail steps to create a bootable USB using Dos command and Diskpart utility. In addition we shall also discuss the process to make bootable usb from iso. This bootable USB can be used for several purposes including:
- Create a Recovery Drive in Windows.
- Recover or reset Windows lost password.
- Restore Windows using System restore Point.
And many more. You can even use this bootable USB to install a fresh copy of Windows/7/8/8.1/10 on your Laptop or Computer. Follow the steps below to create a bootable USB pen drive.
To Open Diskpart console to create Bootable USB flash drive
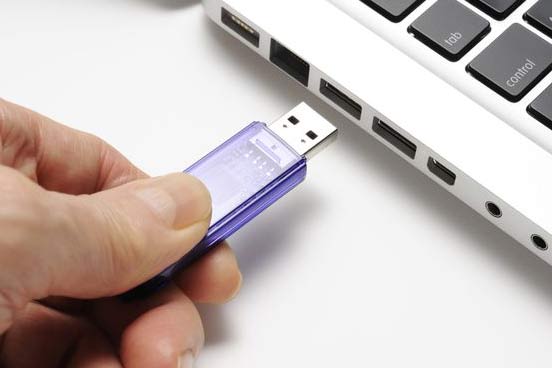
- Insert a USB flash Drive in your Windows running PC.
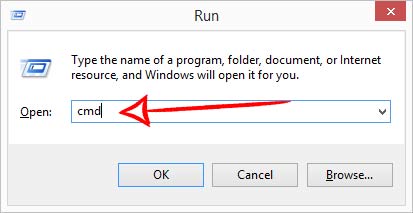
- Press Win+R to open Run Dialogue box.
- Type CMD and press enter to open Dos prompt.
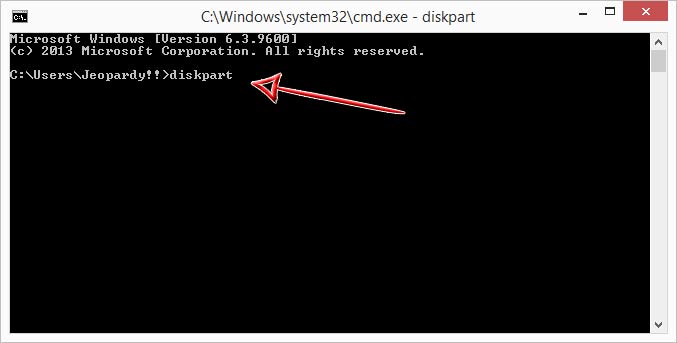
- Type Diskpart in Dos console and press Enter to open DiskPart console.
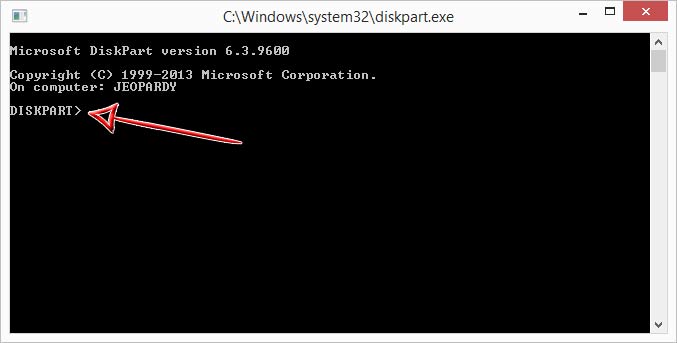
- Now you are under the Diskpart console a. A “DISKPART>” will be displayed at command prompt. Now head to next step as explained below.
To make make bootable usb with Diskpart
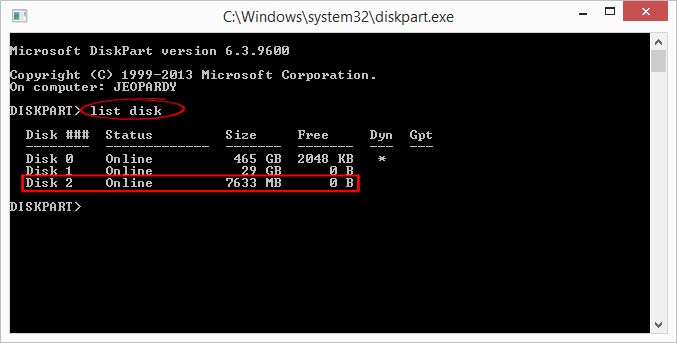
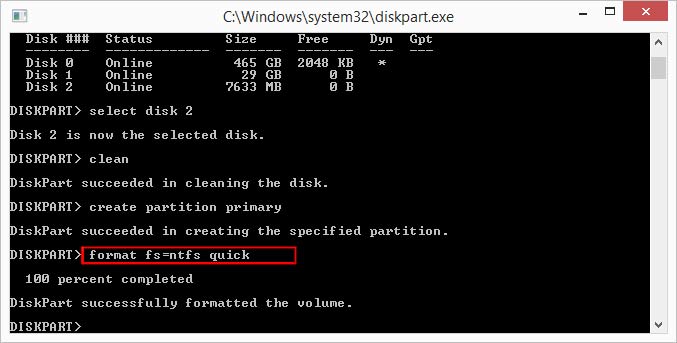
- Type “list disk” in Diskpart console. This will display all the disks connected to your computer including internal Hard Disk and USB Drive.
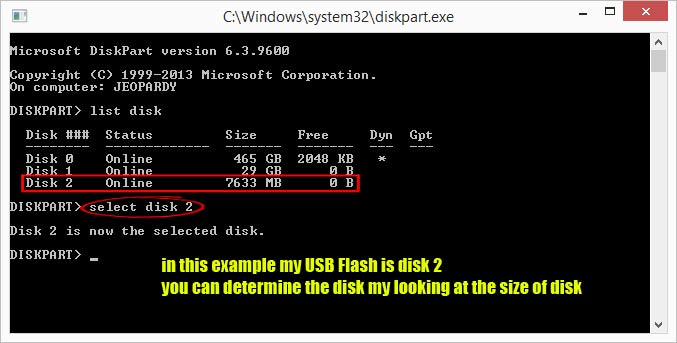
- Type “select disk N“. Here “N” is disk number of USB drive. This will display a message “Disk N is selected“
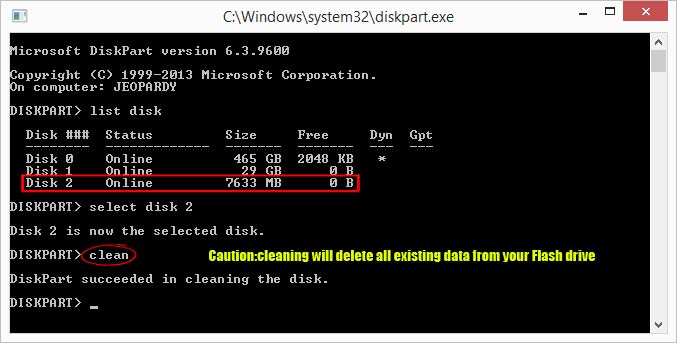
- Type Clean and press Enter to clean existing data on your USB flash drive. Now we need we need to create a partition.
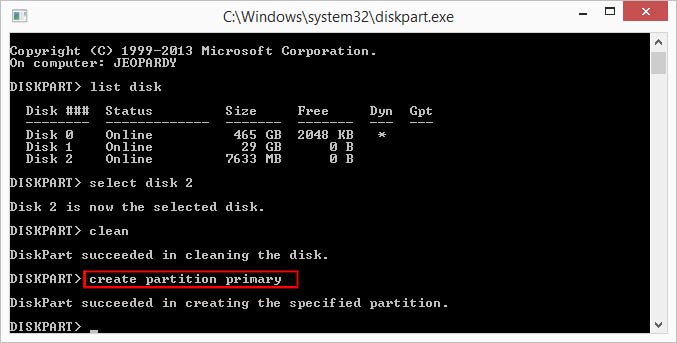
- Type Create Partition Primary and press Enter to create a partition in USB flash Drive.
- To format the disk type format fs=ntfs quick. This will format the USB flash drive. adding quick at the end of command line will perform a quick format.
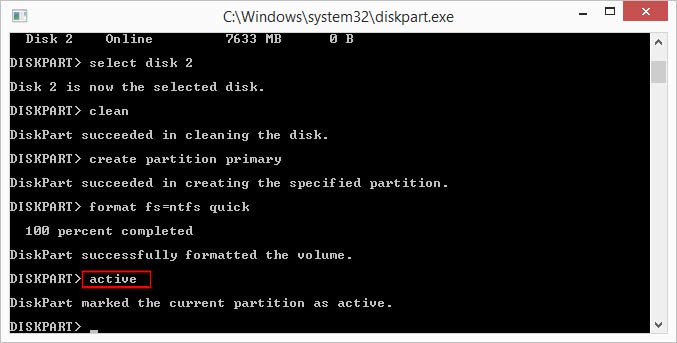
- Type Active to mark the disk as active and make it bootable.
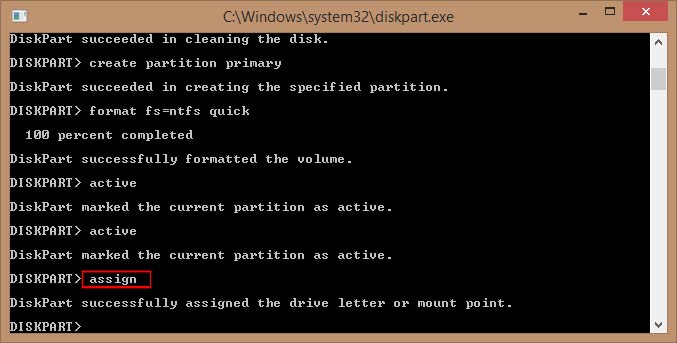
- Finally type assign to assign a disk letter to USB.
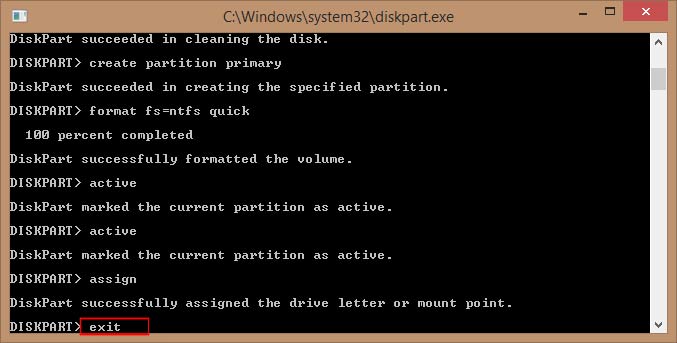
- Type exit to exit Diskpart Console.
Congratulations!! your USB flash is bootable now and you can use this bootable Flash drive to Install new Windows on you Laptop/PC. You can also use this bootable USB Flash drive to recover Windows.Copy Windows Installation File on Bootable USB drive and boot your computer/Laptop using the Flash Drive to install a fresh copy of Windows.
How to Install Windows From bootable USB Drive.
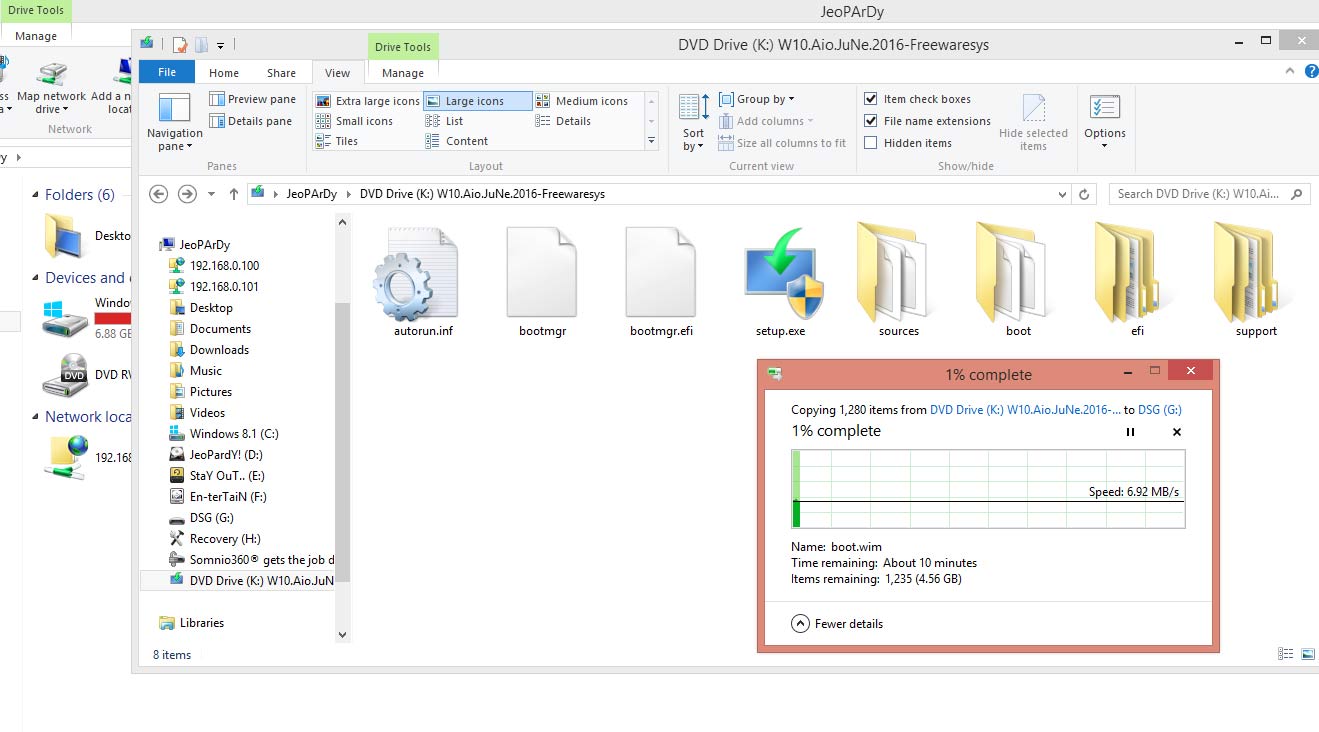
- Copy the Windows installation files in the root of Bootable USB flash drive and restart your Computer.
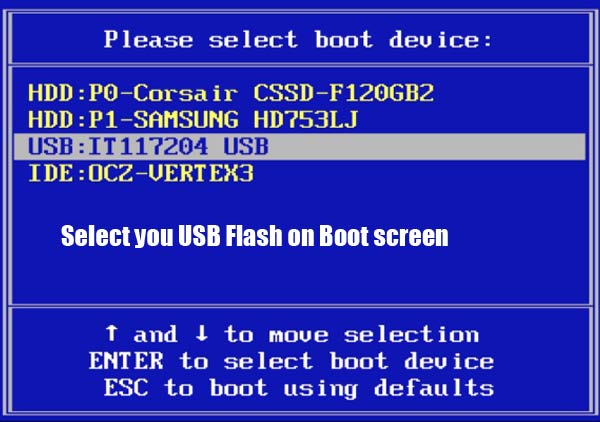
- On the boot screen change boot order to USB flash drive and follow the instructions further. follow this guide to learn how to change boot order on your PC and Laptop of any Manufacturer.
To install Windows using bootable USB Drive, you need Windows installation files. If you are having .iso file of Windows follow the steps here Install Windows from a USB Flash Drive using iso.
Note: You can use this Bootable pendrive to Install any version of Windows. All the Windows released after Windows Vista and later including Windows 7,Windows 8,Windows 8.1 and Windows 10 as well for both 64 bit and 32 bit . You can even use this Bootable usb to recover your windows.
RECOMMENDED:
Difference Between 64 Bit and 34 Bit Windows
Difference Between Windows 10 Pro and Home Edition
Forgot Windows Password How to Bypass Windows Password
This was a guide to create bootable usb flash drive to install Windows from USB pendrive.
For Latest How-to-Guide, Windows Tweaks, Latest Smartphone Updates, Tech-News, Entertainment, WhatApp Tricks, Facebook Updates, Follow Somnio360 on Twitter and Like the Page on Facebook.
